Wednesday, February 10, 2010
 BLOG - The Rise of 'Cordoba'
5:10 AM | Posted by
Eijan Ochoco |
Edit Post
Due to time constraints and concentration, i wasn't able to create a video about the assembly of 'Cordoba' but i was able to take a lot of pictures during the 4-5 hours assembly. 'Cordoba' is the first PC i made from scratch from all the calculations of maximum wattage, the capacity of the 12V rails and to the maximum theoretical overclock ability of the whole system, everything was researched and thought by me, so 'Cordoba' is really special to me. I used to buy those package systems from computer manufacturers like Dell or HP and then upgrading the parts like crazy but one thing that really irritates me is the limitation of this system to upgrades especially when you realized that you can't upgrade this pc with a particular hardware you want because of compatibility after using it for the last 2 years, that part really irritates me. With 'Cordoba', i know the strengths and limitation of the system and upgrading it is less of a hassle than those pre-build PCs.

Removed RV02 from the box, this thing is heavy; already weighing 28 pounds just the case alone. I had a sore back the next day because of lifting it over and over again

Removed the cloth cover of the RV02, This the top cover of the case, see all the air holes
This is a nice explanation of the Stack cooling of the Raven series, this test was done on the RV01, take note, RV02 has better Stack cooling characteristics,Cool ain't it.
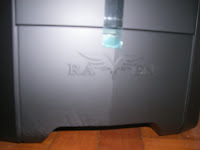
This is the bottom part of the front panel, the logo of the RAVEN series is embossed on it; one sick logo by the way
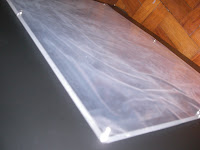
This is the Side panel window of the RV02 still with protective plastic on it
 This is the top of the RV02 without the air hole cover on it, as you can see there is a lot of air holes even to the Expansion slot covers
 The inside of the case
 Those are the tool less locks for your 5.25" drive bays and also at the bottom is the removable HDD cage
 This is the removable and washable dust filters for those massive 180mm fans
 Unboxing the Logitech X-210 Speakers
 This is the Logitech X-210 unboxed
 Removed all the hardware from their boxes, lets get it on!
 A closer look
 Another closer look
 Removed the other side panel of the RVO2, this is where you gonna run all those cables coming form the PSU
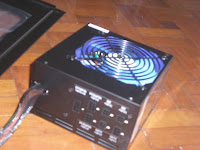 Starting point, attach the PSU to the case
 Unscrewed a part of the case,so that the PSU mounting would be easier
 The PSU is now mounted to the case
 Had an easy time mounting the PSU to case, took me just around 10 minutes.
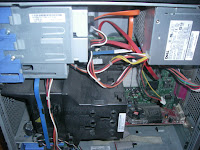 Next step was to attach the CPU to the Motherboard but first i had to get it from my Dell Optiplex 755 system, *Tanan, this is the inside of the Optiplex, its all dusty.
 First time removing the CPU cooler since i acquired the system 2.5 years ago, and the accumulated dust looks like ashes that came from mt. Pinatubo
 The dusty and thermal paste covered Q6600
 Removed the Q6600 from the Optiplex 755's Mobo
 Cleaned and attached it to the ASUS P5Q SE PLUS mobo
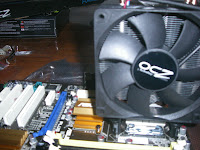 Attached the OCZ Vendetta 2 Cpu Cooler on top of the Q6600, the easy installation feature that the Vendetta 2 bragged about...took me 2 hours to install it perfectly to the mobo, Those damn push pins won't lock with the mobo, had to remove and reaaply thermal paste like 3 times.
Mounting the DVD RW drive to the case
 Mounted the MOBO to the case and also mounted the 2x2gb Patriot Gamer Series Rams and HiS Radeon 5770
Attached the cables to their intended slots, due to some stupid placement of some power slots especially the 24pin Mobo power slot which is located on the middle of the Mobo, the mobo is preventing me with some good cable management because of this imperfection
That's all for now
Tune in tomorrow for the benchies of Cordoba and the addicting world of Overclocking
Peace Out
Subscribe to:
Post Comments (Atom)
ADS BY:
About Me
Blog Archive
-
▼
2010
(83)
-
▼
February
(25)
- Game Review - Heavy Rain
- Blog - Speeding up Windows 7 -- Useful for those s...
- Blog - A very cool Animation video
- Blog - New Parental Control -- It is so damn irrit...
- Blog - New Trailers of my 'Must-See' movies
- Blog - Another reason why people are so into Pirat...
- Unboxing - Sunbeam Tech Sound Controller and CCFL ...
- Unboxing - Asus VH192D LCD Monitor
- Unboxing - Intel Pentium Dual Core E5400
- Movie Review - Ðλ¥BƦEλҞEƦ$ -- At least this one do...
- Blog - ҎƦł$Ø₦ BƦEλҞ ₡Ø₦$ҎłƦλ₡¥ -- ÐØ₦'Ŧ BU¥ ŦҤł$ G...
- Recommendation - Spartacus:Blood and Sand
- Recommendation - Merlin
- Blog - New Trailer of 'The Last Airbender'
- Movie Review - Percy Jackson & The Olympians: The ...
- Movie Review - Did your hear about the Morgans? --...
- BLOG - The Rise of 'Cordoba'
- Blog - Dell Optiplex 755 Upgrade Project The Rest ...
- Blog - So you want to be professional gamer?!
- Blog - Dell Optiplex 755 Upgrade Project Spoilers ...
- Blog - Dell Optiplex 755 Upgrade Project Spoilers
- Blog - Out of topic, but i have found Mark P's Twin!
- Upgrade Project - ASUS P5Q SE PLUS
- Blog - Some Explanation about the IPAD
- Movie Review - The Tooth Fairy, What a Toothache!!
-
▼
February
(25)
Labels
Adobe After Effects
Alberto Falcone
Angry Birds
Anonymous
ATI
Avenger
Batman:The Dark Knight Rises
Battlefield 3
Blog
Breakout Kings
Camelot
Captain America
Captain America: The First Avenger
Dexter
DSL
Dual Monitor
Eijan's Favorites
Eijan's Recommendation
Eijan's Recommendation Hardware
Eijan's Recommendation Game
Eijan's Recommendation Software
Eijan's Recommendation TV
Eye-finity
Firefox
Firefox 4
Fun Stuff
Funny
Funny News
G510
Game of Thrones
Game of Thrones Episode 1
Game Preview
Game Review
Game Trailer
Gaming
Gaming Keyboard
George Hotz
Green Lantern
Hardware Review
Hardware. Hardware Preview
James Franco
Jeri Ryan
Joseph Gordon-Levitt
LA Noire
Led Monitor
Light Saber
Logitech
Logitech G510
Max Payne
Max Payne 3
Michael Jai White
Mike Tyson
MLB
MLB 11
MLB 11 The Show
Mortal Kombat
Mortal Kombat Legacy
Movie
Movie Preview
Movie Review
Mozilla Firefox 4
Multiple Monitor
Ned Stark
News
Nicolas Cage
Nintendo
Opera Browser
Playstation
Playstation Network
Preview
Preview - TV
Preview - Web. Mortal Kombat
Project Cafe
Protoss
PS3
PSN
Razer Sucks
Renewal card
Review
Rhys Ifans
Rise of the Apes
Rise of the Planet of the Apes
Sean Bean
Season of the Witch
Shogun
Shogun 2
Shogun 2 Total War
Sifteo
Sifteo Cubes
Software
Software Review
Sony
Sony PS3
Starcraft 2
The Amazing Spider-Man
The Lizard
The Show
Total War
Trailer
TV News
Tv Previes
TV Preview
TV Series Review
Tv Shows
Unboxing
Viewsonic
Viewsonic 2450wm
Web Series
Wii
Wii 2
Wiimote


0 comments:
Post a Comment